🐧 TryHackMe — Linux Fundamentals (Pt1) | Learning Guide
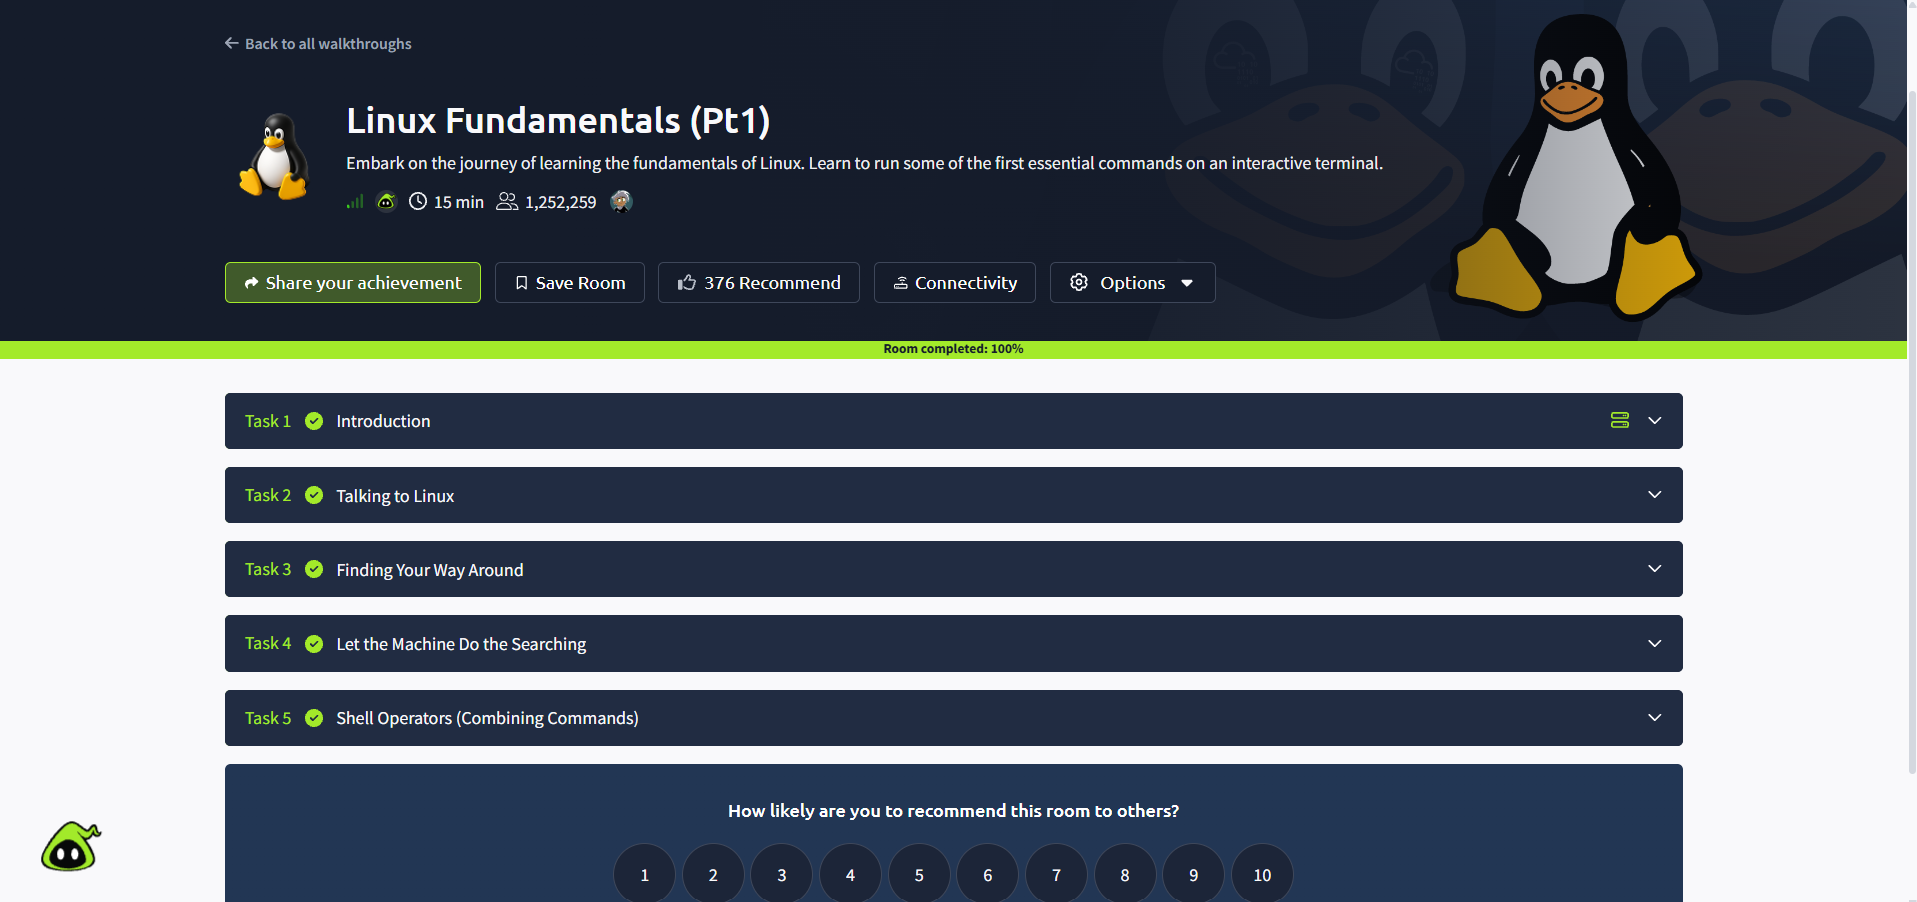
Platform: TryHackMe Room: Linux Fundamentals (Pt1) Module: Linux Fundamentals Estimated Time: 15 Minutes Status: Completed ✅
Spoiler-Free Learning Guide: This article contains no TryHackMe flags, challenge-file contents, or direct task answers. It focuses on the Linux concepts, commands, and practical methodology I learned while completing the room.
Introduction
After working with Windows, networking, SOC tools, and endpoint security, I went back to strengthen one of the most important foundations in cybersecurity:
Linux
Linux appears almost everywhere in cybersecurity.
It powers:
Web Servers
Cloud Infrastructure
Security Appliances
Containers
Network Devices
Embedded Systems
Penetration Testing Tools
SOC Infrastructure
Many cybersecurity tools are also designed primarily for Linux environments.
The Linux Fundamentals (Pt1) room introduces the Linux terminal and some of the commands I will repeatedly use throughout my cybersecurity journey.
The room follows this learning path:
Introduction
     ↓
Talking to Linux
     ↓
Finding Your Way Around
     ↓
Searching Files & Content
     ↓
Shell Operators
The goal is not to memorize hundreds of commands.
It is to become comfortable enough with the terminal that navigating and investigating a Linux system starts to feel natural.
Task 1 — Introduction
The first task introduces Linux and provides an interactive Linux machine directly inside the browser.
Unlike Windows, where most beginners interact primarily through a graphical interface, Linux administration frequently happens through the:
Terminal
The terminal allows us to communicate with the operating system by typing commands.
Conceptually:
User
  |
  | Command
  v
Terminal / Shell
  |
  v
Linux
  |
  | Output
  v
User
For example, instead of clicking through folders using a mouse, I can navigate the filesystem with commands.
Instead of opening system menus, I can ask Linux directly for information.
Where Is Linux Used?
One important takeaway was understanding how widespread Linux actually is.
Linux can be found in:
Web Servers
Android-based Devices
Cloud Servers
Point-of-Sale Systems
Smart Devices
Industrial Systems
Networking Equipment
Supercomputers
For cybersecurity, this matters because many systems I may later:
Defend
Investigate
Administer
Test
or
Exploit
will run Linux.
Linux Distributions
Linux is available through different distributions.
Examples include:
Ubuntu
Debian
Fedora
Arch Linux
Kali Linux
Parrot OS
Different distributions may package software differently, but the fundamental command-line skills are largely transferable.
For this introductory environment, the important part was becoming comfortable with a Linux terminal rather than focusing on distribution differences.
🛠️ Hands-On / Commands — Task 1
Tools Used
TryHackMe browser lab
Linux terminal
Ubuntu environment
This task mainly involved starting the interactive Linux machine and getting comfortable with the terminal.
A terminal prompt may look similar to:
user@machine:~$
The important thing to recognize is that this is waiting for us to enter a command.
For example:
echo "Hello Linux"
The shell processes the command and prints the result.
My first mental model became:
Command
   ↓
Shell interprets it
   ↓
Linux performs action
   ↓
Output returned
Task 2 — Talking to Linux
This task introduces some of the first commands every Linux beginner should know.
The two most basic ideas are:
Who am I?
and:
How do I print something?
whoami
The command:
whoami
shows the user account currently running the shell.
This may seem simple, but it is extremely important in cybersecurity.
Different Linux users may have different:
Permissions
File access
Command privileges
Administrative capabilities
If I gain access to a Linux machine during an authorized lab, one of my first questions should be:
Which user am I operating as?
Conceptually:
Linux Machine
     ↓
Current Session
     ↓
whoami
     ↓
Current User
Why User Identity Matters
Suppose I am logged in as:
standard-user
I may only be able to access that user's files.
Another account might have administrative privileges.
Therefore:
User Identity
      ↓
Determines
      ↓
Permissions
This becomes very important later when learning:
Linux Permissions
sudo
Privilege Escalation
User Groups
Post-Exploitation
echo
Another fundamental command is:
echo
It prints text to the terminal.
For example:
echo "Learning Linux"
Output:
Learning Linux
This looks simple, but echo becomes much more useful once combined with:
Variables
Files
Shell scripts
Redirection
Pipelines
Quoting Text
For multiple words, it is often convenient to use quotes:
echo "Linux is useful for cybersecurity"
This treats the text as one argument.
🛠️ Hands-On / Commands — Task 2
Commands Practiced
whoami
echo "Hello Linux"
A small independent practice example:
echo "Cybersecurity Lab"
Then:
whoami
This helped reinforce two fundamental ideas:
whoami
   ↓
Find identity

echo
   ↓
Produce output
These commands look basic, but they are building blocks for much more advanced Linux workflows.
Task 3 — Finding Your Way Around
The next task introduces filesystem navigation.
Instead of using a graphical file explorer, Linux lets us move around directories entirely from the terminal.
Four commands form the foundation:
ls
cd
cat
pwd
pwd — Where Am I?
pwd stands for:
Print Working Directory
Run:
pwd
It returns the full path of the directory I am currently inside.
Example:
/home/user
This is especially useful when I have moved through several directories and lose track of my current location.
My mental shortcut:
pwd
 =
Where am I?
ls — What Is Here?
To display the contents of the current directory:
ls
It may show:
Documents
Downloads
Pictures
notes.txt
So:
pwd
 ↓
Where am I?

ls
 ↓
What is here?
These two commands naturally work together.
More Detailed Listing
A commonly useful variation is:
ls -l
which displays more details about each file.
Another useful command is:
ls -la
which also includes hidden files.
Files beginning with:
.
are normally hidden from a basic ls listing.
This becomes especially useful later when looking for:
Configuration files
Shell history
Application settings
SSH files
cd — Change Directory
To enter another directory:
cd Documents
Then:
pwd
might show:
/home/user/Documents
To move back one directory:
cd ..
To return to the current user's home directory:
cd ~
or simply:
cd
Understanding Linux Paths
Linux uses:
/
as the root of the filesystem.
Conceptually:
/
├── home
│   └── user
├── etc
├── var
├── tmp
├── usr
└── root
A full path might be:
/home/user/Documents
Absolute vs Relative Paths
Suppose I am currently in:
/home/user
I could enter Documents using a relative path:
cd Documents
or using the absolute path:
cd /home/user/Documents
So:
Relative Path
=
Based on current location
while:
Absolute Path
=
Starts from /
cat — Read a File
To display the contents of a text file:
cat notes.txt
For example:
echo "Linux practice" > notes.txt
cat notes.txt
Output:
Linux practice
cat is extremely common during:
System enumeration
Log review
Configuration inspection
CTFs
Server administration
🛠️ Hands-On / Commands — Task 3
Commands Practiced
pwd
ls
cd <directory>
cd ..
cat <file>
A safe practice workflow:
pwd
ls
mkdir linux-practice
cd linux-practice
echo "My Linux notes" > notes.txt
ls
cat notes.txt
cd ..
This recreates the navigation workflow independently without revealing any TryHackMe challenge-file content.
Task 4 — Let the Machine Do the Searching
Real Linux systems can contain:
Thousands of directories

Millions of files

Huge log files

Large configuration trees
Searching manually would be extremely inefficient.
Linux gives us commands to do the searching for us.
Two especially important commands are:
find
grep
The distinction is:
find
 ↓
Search for files/directories

grep
 ↓
Search inside text
find — Search for Files
Suppose I need to locate:
notes.txt
Instead of manually browsing every directory, I can use:
find . -name "notes.txt"
Here:
.
means:
Start searching from the current directory
and:
-name
tells find to match the filename.
Searching From a Specific Directory
For example:
find /home -name "notes.txt"
means:
Search inside /home
for a file named notes.txt
Wildcards With find
Suppose I want every .txt file:
find . -name "*.txt"
The wildcard:
*
can represent any matching sequence of characters.
grep — Search Inside Files
Suppose I have a log containing hundreds of lines.
Instead of:
cat server.log
and manually reading everything, I can search for a term:
grep "failed" server.log
This returns only lines containing:
failed
Case-Insensitive Search
A useful option is:
grep -i "error" server.log
The:
-i
makes the search case-insensitive.
So it can match:
error
ERROR
Error
Why grep Matters in Cybersecurity
Security analysts regularly work with:
Authentication logs
Web server logs
Firewall logs
Application logs
Malware output
Large text datasets
Imagine a log has:
50,000 lines
and I need to locate activity involving an IP.
Instead of reading line by line:
grep "192.0.2.25" access.log
can instantly isolate relevant entries.
Combining find and grep
Later, these concepts can be combined.
For example:
find . -name "*.log"
locates log files.
Then:
grep "failed" example.log
searches inside one.
This gives me a reusable investigation pattern:
Locate file
    ↓
Inspect content
    ↓
Search interesting text
🛠️ Hands-On / Commands — Task 4
Commands Practiced
find . -name "filename.txt"
find . -name "*.txt"
grep "keyword" file.txt
grep -i "keyword" file.txt
Independent example:
echo "Successful login" > demo.log
echo "Failed login" >> demo.log
echo "Successful logout" >> demo.log
Now:
grep "Failed" demo.log
returns only the matching event.
That demonstrates the actual methodology without exposing the TryHackMe flag stored in its practice log.
Task 5 — Shell Operators (Combining Commands)
This task was where the Linux terminal started becoming much more powerful.
Instead of executing only one command at a time, shell operators allow commands to be:
Combined
Sequenced
Run in background
Redirected into files
Appended to files
The room introduces four important operators:
| Operator | Purpose |
|---|---|
& |
Run a command in the background |
&& |
Run the next command after the first succeeds |
> |
Redirect output and overwrite |
>> |
Redirect output and append |
& — Run in the Background
A command normally occupies the terminal until it finishes.
For example:
some-command
Using:
some-command &
allows the process to run in the background while returning control of the shell.
Conceptually:
Command
   ↓
Background
   ↓
Terminal available again
This becomes useful for longer-running operations.
&& — Chain Commands
The operator:
&&
lets us execute one command after another when the first succeeds.
For example:
mkdir practice && cd practice
This means:
Create directory
      ↓
Success?
      ↓
Enter directory
This can make multi-step terminal workflows much faster.
> — Redirect Output
Normally:
echo "hello"
prints to the screen.
Using:
echo "hello" > message.txt
redirects the output into a file.
Then:
cat message.txt
shows:
hello
Important: > Overwrites
Suppose:
echo "first" > notes.txt
Then:
echo "second" > notes.txt
The previous contents are replaced.
The file now contains:
second
So:
>
=
Write / overwrite
>> — Append Output
Suppose I want to preserve what is already inside the file.
Use:
echo "first" > notes.txt
echo "second" >> notes.txt
Now:
cat notes.txt
shows:
first
second
Therefore:
>>
=
Append
This difference is extremely important when working with logs or notes.
Why Redirection Matters in Cybersecurity
Suppose I run:
whoami
and want to save the output.
Instead of manually copying it:
whoami > identity.txt
Or suppose I want to save enumeration results:
find /home -name "*.txt" > files-found.txt
This enables:
Command
   ↓
Useful output
   ↓
Store in file
   ↓
Review later
That is much more scalable than copying text by hand.
Combining Multiple Ideas
Now the commands from earlier tasks can work together.
Example:
mkdir investigation && cd investigation
Then:
echo "Starting investigation" > notes.txt
Then:
whoami >> notes.txt
Then:
cat notes.txt
This combines:
Directory creation
+
Navigation
+
Output
+
Redirection
+
Appending
into one practical workflow.
🛠️ Hands-On / Commands — Task 5
Operators Practiced
&
&&
>
>>
Independent practice:
mkdir shell-practice && cd shell-practice
echo "Linux Fundamentals" > notes.txt
echo "Shell Operators" >> notes.txt
cat notes.txt
Output:
Linux Fundamentals
Shell Operators
This demonstrates the same shell concepts without revealing the room's challenge submissions.
Complete Linux Fundamentals Pt1 Workflow
By the end of the room, the commands started connecting naturally:
                    LINUX TERMINAL
                          |
                          v
                       whoami
                          |
                          v
                         echo
                          |
                          v
                    FILESYSTEM
                          |
              ┌───────────┼───────────┐
              |           |           |
             pwd         ls          cd
                                      |
                                      v
                                     cat
                                      |
                                      v
                                  SEARCHING
                                /           \
                              find          grep
                                \           /
                                 \         /
                                  v       v
                              SHELL OPERATORS
                          &    &&    >    >>
Command Cheat Sheet
| Command | Purpose |
|---|---|
whoami |
Display current user |
echo |
Print text/output |
pwd |
Show current directory |
ls |
List directory contents |
ls -la |
Include detailed and hidden files |
cd |
Change directory |
cd .. |
Move one directory upward |
cd ~ |
Return to home directory |
cat |
Display file contents |
find |
Search for files/directories |
grep |
Search inside text |
grep -i |
Case-insensitive text search |
& |
Run command in background |
&& |
Chain commands conditionally |
> |
Redirect and overwrite output |
>> |
Redirect and append output |
My Basic Linux Investigation Workflow
If I access an unfamiliar Linux system in an authorized environment, these basic commands already let me answer useful questions.
whoami
Who am I?
pwd
Where am I?
ls -la
What is here?
cat <file>
What does this file contain?
find . -name "<filename>"
Where is this file?
grep "<keyword>" <file>
Where does this text appear?
That gives a simple investigation sequence:
IDENTITY
   ↓
LOCATION
   ↓
FILES
   ↓
CONTENT
   ↓
SEARCH
Key Lessons Learned
1. Linux CLI Is a Core Cybersecurity Skill
Many security tools expect us to be comfortable working from a terminal.
Learning Linux is therefore not separate from cybersecurity.
It is part of the foundation.
2. Always Know Who You Are
whoami
may be one of the simplest commands in Linux, but the result determines what permissions we have.
Identity
   ↓
Privileges
   ↓
Available Actions
3. Navigation Becomes Fast With Four Commands
pwd
ls
cd
cat
are enough to begin exploring almost any Linux filesystem.
4. Searching Beats Manual Browsing
Instead of opening hundreds of files:
find
+
grep
can rapidly locate useful information.
This is particularly important when dealing with large logs.
5. Redirection Makes the Shell Much More Powerful
Without redirection:
Command
   ↓
Output on screen
With redirection:
Command
   ↓
Output
   ↓
File
   ↓
Reuse later
This is the beginning of automation.
6. > and >> Are Not the Same
This is worth remembering:
>
=
Overwrite
while:
>>
=
Append
Accidentally using > on an important file could destroy its existing contents.
7. Commands Become Powerful When Combined
The real strength of Linux is not knowing one command.
It is being able to combine small commands into workflows.
For example:
mkdir investigation && cd investigation
or:
echo "New finding" >> notes.txt
Linux tools are designed to work together.
My Final Mental Model
                        LINUX
                          |
                       TERMINAL
                          |
          ┌───────────────┼───────────────┐
          |               |               |
       IDENTITY        NAVIGATION       OUTPUT
          |               |               |
       whoami          pwd / ls          echo
                          |
                          cd
                          |
                          cat
                          |
                       SEARCH
                     /        \
                  find        grep
                     \        /
                      \      /
                       SHELL
                     OPERATORS
                 &   &&   >   >>
Ethical Learning Note
This article is a learning guide rather than an answer dump.
I included:
✅ Linux fundamentals
✅ Command syntax
✅ Independent examples
✅ Filesystem navigation
✅ Searching methodology
✅ Shell operators
✅ Cybersecurity relevance
while intentionally excluding:
❌ TryHackMe flags
❌ Challenge-file contents
❌ Folder-answer submissions
❌ access.log flag
❌ Direct task-question answers
The goal is to document what I learned while leaving the actual TryHackMe exercises for other learners to solve themselves.
Resources
🌐 TryHackMe Room: Linux Fundamentals (Pt1)
👨💻 TryHackMe Profile: sunnysharma11200
💻 GitHub Repository: tryhackme-writeups
✍️ Hashnode Blog: cybersecurity-learning.hashnode.dev
Connect with Me
TryHackMe: sunnysharma11200
GitHub: SunnySharma04
Hashnode: cybersecurity-learning
LinkedIn: Sunny Sharma
Happy Learning! 🚀